This software is a port of SmsPlus, a Sega Master System and Game Gear emulator for RP2040/RP2350 based microcontroller boards like the RaspberryPi Pico and Pico 2. Sound and video are ouput over HDMI. The code for HDMI output is based on Shuichi Takano's Pico-InfoNes project which in turn is based on PicoDVI.
Create a FAT32 or exFAT formatted SD card and copy your Master System (.sms) and/or Game Gear (.gg) roms and optional metadata on to it. You can organize the roms in directories. A menu is displayed on which you can select the rom to play.
Supports two controllers for two player Master System games. See "about two player games" below for specifics and limitations
See the releases page for the supported RP2040/RP2350 boards.
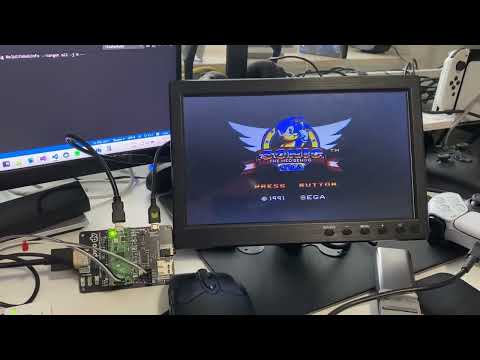
Click on image below to see a demo video.
The emulator works very well on the Pico 2/RP2350. On the Pico/RP2040, some games may not run at full speed or at all. (like afterburner).
Warning
On Pico/RP2040, some games show red flashing between screens. This can be occasionally or severe depending on the game. If you are sensitive for this, or experience health issues while playing those games, please stop playing immediately.
For Sega Master System (SMS) games that support it, progress can be saved to SD card.
- Saving: To ensure game data is written to the SD card, you must return to the main menu by pressing Select + Start.
- Save Location: Save files are stored in the
/SAVESdirectory with a.SAVextension. - Auto-Loading: When you start a game, its corresponding
.SAVfile will be loaded automatically (if available).
Note
Make sure to return to the menu before powering off, or the save data may be lost.
The binary specific for your config can be downloaded from the releases page.
You need a FAT32 or exFAT formatted SD card to put your .sms and .gg roms on.
Note
For detailed instructions how to setup specific configurations, see the Pico-InfonesPlus sister project.
- Raspberry Pi Pico and Pimoroni Pico DV Demo Base
- Custom Printed Circuit Board
- Breadboard with components.
These boards already contain an RP2040 cpu, a separate Raspberry Pi Pico is not needed.
- Adafruit Feather RP2040 with DVI Output and FeatherWing - RTC + SD.
- Waveshare RP2040-PiZero Development Board
- Adafruit Fruit Jam
- Adafruit Metro RP2350 or Adafruit Metro RP2350 with PSRAM
- Pimoroni Pico Plus 2 Use the breadboard config or Pimoroni Pico DV Demo base. This board does not fit the PCB because of the SP/CE connector on back of the board. The PSRAM on the board is used in stead of flash to load the roms from SD.
An additional PCB design for Waveshare RP2040 & RP2350 Zero including case design by DynaMight1124 based around cheaper but harder to solder components for those that fancy a bigger challenge. It also allows the design to be smaller.
The following controllers are supported.
- BUFFALO BGC-FC801
- SONY DUALSHOCK 4
- SONY DualSense
- Xinput type controllers (Xbox)
- Retro-bit 8 button Genesis-USB.
- and more...
Also original NES and WII-classic controllers are supported in some configurations.
See the Pico-InfonesPlus sister project for more info.
The emulator supports two player games using two NES controllers or an USB gamecontroller and a NES controller.
Note
You cannot use two USB controllers for two player games. At the moment only one USB controller is recognized by the driver. In this case the USB controller is always player 1. Player 2 must be a NES controller.
| Player 1 | Player 2 | |
|---|---|---|
| USB controller connected | USB | NES port 1 or NES port 2 |
| No usb controller connected | NES port 1 | NES port 2 |
Below the button mapping for different controllers. You can also use a USB-keyboard.
| (S)NES | Genesis | XInput | Dual Shock/Sense | |
|---|---|---|---|---|
| Button1 | B (*) | A | A | X |
| Button2 | A | B | B | Circle |
| Select | select | Mode or C | Select | Select |
(*) On SNES USB-controller press Y once to activate the B-button.
Gamepad buttons:
- UP/DOWN: Next/previous item in the menu.
- LEFT/RIGHT: next/previous page.
- Button2 : Open folder/flash and start game.
- Button1 : Back to parent folder.
- START: Show metadata and box art (when available).
The colors in the menu can be changed and saved:
- Select + Up/Down changes the foreground color.
- Select + Left/Right changes the background color.
- Select + Button2 saves the colors. Screen will flicker when saved.
- Select + Button1 resets the colors to default. (Black on white)
Gamepad buttons:
- SELECT + START, Xbox button: Resets back to the SD Card menu. Game saves are saved to the SD card.
- SELECT + UP/SELECT + DOWN: switches screen modes.
- START + Button2 : Toggle framerate display
- Pimoroni Pico DV Demo Base only: SELECT + LEFT: Switch audio output to the connected speakers on the line-out jack of the Pimoroni Pico DV Demo Base. The speaker setting will be remembered when the emulator is restarted.
- Fruit Jam Only
- pushbutton 1 (on board): Mute audio of built-in speaker. Audio is still outputted to the audio jack.
- SELECT + UP: Toggle scanlines.
- pushbutton 2 (on board) or SELECT + RIGHT: Toggles the VU meter on or off. (NeoPixel LEDs light up in sync with the music rhythm)
- Genesis Mini Controller: When using a Genesis Mini 3 button controller, press C for SELECT. On the 8-button Genesis controllers, MODE acts as SELECT.
- USB-keyboard: When using an USB-Keyboard
- Cursor keys: up, down, left, right
- A: Select
- S: Start
- Z: Button2
- X: Button1

Download the metadata pack from the releases page It contains box art, game info and themed borders/bezels for many games. The metadata is used in the menu to show box art and game info when a rom is selected. When the screensaver is started, random box art is shown. Extra on RP2350 boards: When in-game, themed borders/bezels are shown around the game screen.
- Download pack here.
- Extract the zip contents to the root of the SD card.
- In the menu:
- Highlight a game and press START → show cover art and metadata.
- Press SELECT → show full game description.
- Press Button1 → return to menu.
- Press START or Button2 → start the game.
- RP2350-only: In-game: A themed bezel is shown:
| Master System | Game Gear |
|---|---|
 |
 |
Use the bld.sh script to build the project. Build using Ubuntu Linux or WSL on Windows. See the Pico SDK installation instructions on how to set up the build environment.
Use ./bld.sh --h for options.
The resulting .uf2 file will be in the releases/ folder. Copy it to the Pico when in bootloader mode.